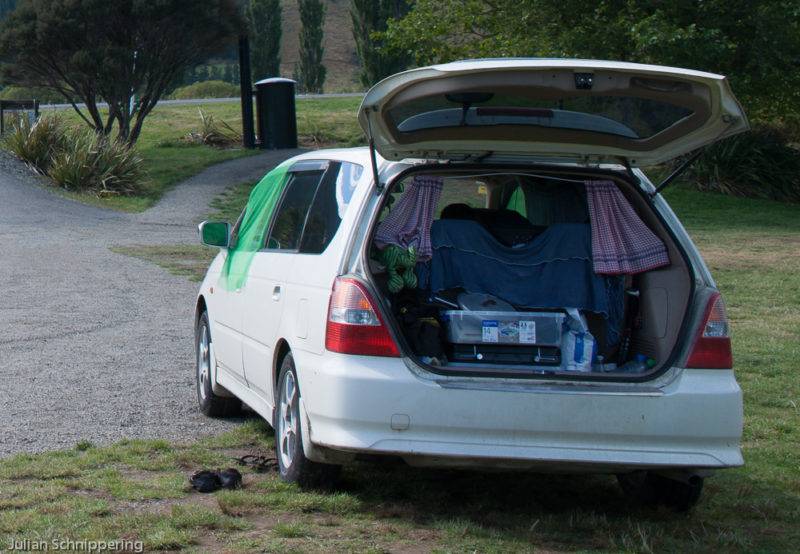
How to sew a mosquito net for your car in New Zealand
It is getting dark outside, you are getting tired and you want to go to bed soon. You just made yourself comfortable in the sleeping bag, and then you hear a noise – bssssss …. Oh, no! A mosquito (and probably countless sand flies) made it into your car.
Many, who sleep in the car, will know that problem; if you close the windows, it gets warm very quickly, but as soon as you open a window, all uninvited guests come to have a look. The solution is simple – a mosquito net must come! But where do you get one and how expensive will it be? We have the solution for you – Do it yourself mosquito net for the windows!
What do you need for a cheap insect net over the windows:
- Fabric / tulle / net from the roll
- Something to measure for the windows
- Needle and string
- Small round or long magnets

DIY mosquito net
That's how it's done:
You can either buy the fabric or tulle cheaply in the dollar shops that can be found everywhere, or you can find it in the Empire or other fabric stores of this kind. Just ask if you do not find it yourself, you need a salesman to cut off the fabric anyway.
You should know approximately the size of your car windows (if you do not have a ruler to measure, take a thread, you hold one end to one side of the window and pull the thread to the other side, there you tie a knot in the thread. You could also take your elbow or anything else that has a reproducible length to gauge). When choosing fabrics, you should make sure that wind easily passes through the fabric. That is best fine-meshed and fine enough so sand flies cannot get through. We used tight-meshed tulle.
It is also important that the size of the fabric is much larger than the size of your window (15cm more for the upper area and depending on the car door 10-30cm more per side.
Tip: colourful colours attract bees and other insects; white is loved by Sand flies. We chose green because bees and insects do not think it's a flower.
If you have your fabric, you can now cut it so that it fits well over your window and you have enough fabric on the edge to pinch it in the door.
Next you sew now the corners. To do this, place the fabric over the open door from the outside and knock the fabric over the corners of the door at the top. Then you sew them so tight that you can simply hang the net over the door.
So that the net is not blown up in the wind, you can either:
- Clamp the net in the door frame (has the disadvantage that you cannot open the door anymore or have to re-clamp the net again and again)
- Fix the net to the body with magnets (2 small magnets at each lower corner are normally sufficient.
- Sew a magnetic strip into the net at the bottom and secure the net down the entire width.
Now you can sleep with windows open without having annoying bloodsuckers in the car.
Questions, comments or ideas
Send us a picture of your self-sewn mosquito nets and write us in the comments how you made your mosquito net! We look forward to your experiences! If you still have questions then write us a comment here under the post.
Ask us anything
We run this blog so you can have a great time in New Zealand. All the articles and videos are free for anyone.
If you want to ask an individual question about Newzealand, your working holiday or anything else around travelling New Zealand, then this is your chance.
Even it always looks like holiday, this website and the project is a fulltime business. So you can support us with any question if you'd like.
Simply click the button and ask us, in exchange for your answer you can give what you value our time.
If every visitor would support us with 1€ per year, our business would be up running for long times. Therefore we count on your support!
A big thank you from the depth of our hearts. Julian & the team of Project-Newzealand


